
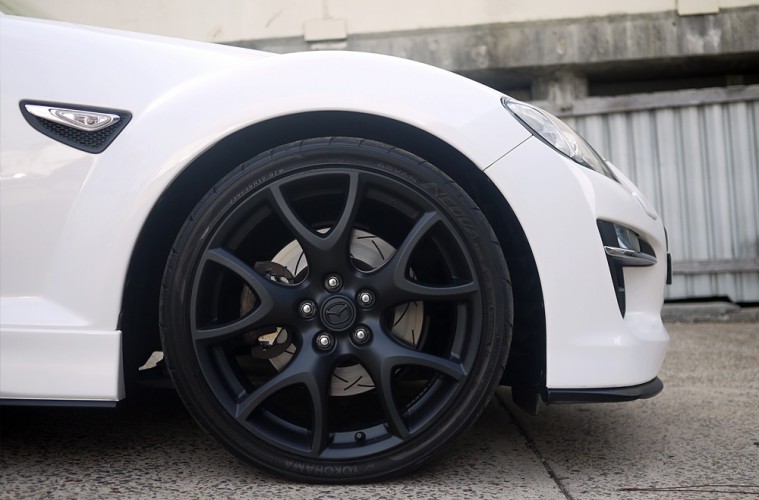
Feel like changing the colour of your wheels, but not permanently? Well, Plasti Dip is here to save your life. We felt like breathing a new lease on life onto our project Rx8. Being a GT model, it comes out of the factory wearing a set of awesome forged lightweight 19” rims. With these wheels having a hefty RRP from Mazda, we wanted to change the look of them without damaging or permanently ruining the factory metallic finish. This is where Plasti Dip comes in.
Plasti Dip is a spray-on latex that can be applied to a number of solid surfaces. When you’re done with the finish, or wish to change it up, you can simply peel it off. It does not damage whatever you painted over and leaves no sticky residues that require cleaning. All in all, a simple easy to use paint that’s forgiving to use for beginners. Colours range from simples whites and blacks through to ‘blaze orange’ and other bright colours. Check out their website www.getdipped.com.au for more information regarding colours.
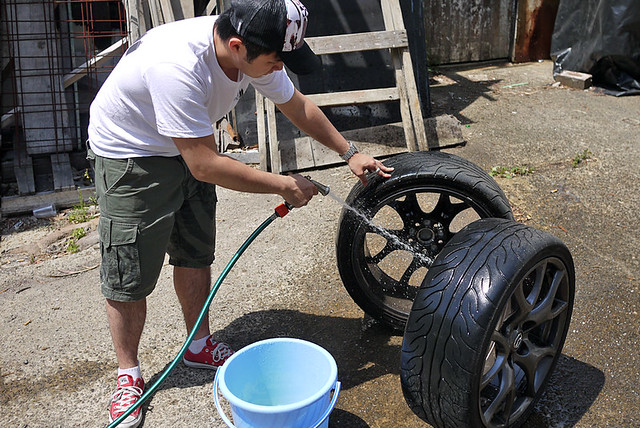
Like with anything that involves painting, prep work is important and key. Taking the time to prepare your surface, cleaning it thoroughly, ensures that the dip will stick to the surface properly. There’s nothing worse than starting to paint, then realizing your wheels are covered in silicon or some other form of wax that creates dimples and spreads the paint. So what are we using to clean?
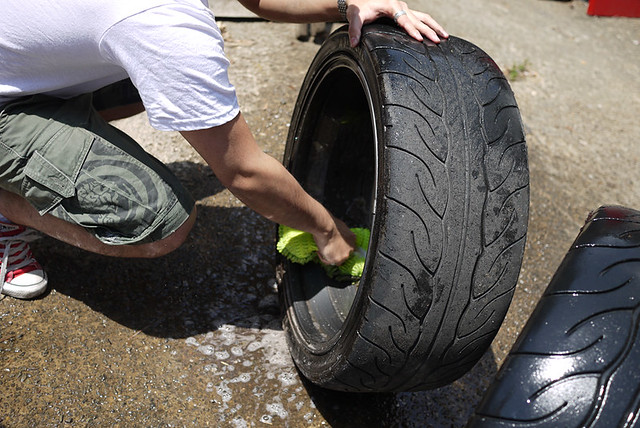
Nothing better than good old car wash. The first step of cleaning involves a suddy car care product and a cleaning mitt. Spending the time to ‘detail’ each wheel is worth it. The longer you spend preparing the surface, the better the finish will be and the longer it will last. Brake dust tends to be quite stubborn, so be prepared to scrub away for some time if your wheels have not been properly cleaned before.
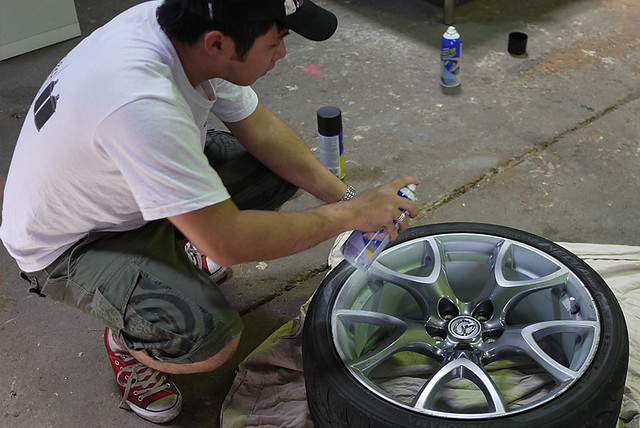
Painting on a warm sunny day is good – not only does the ambient heat help the dip stick, it also promotes the drying of the rims. Once the area is clean and dry, you can begin to paint. Make sure you do so in a highly ventilated area, as dip emits quite a strong odor. Working in sections of the spoke, slowly building up your coverage is the best way to lay the dip down. It is similar to painting with a rattle can, but far more forgiving – which is great for new comers. We have started by using a white-base coat.
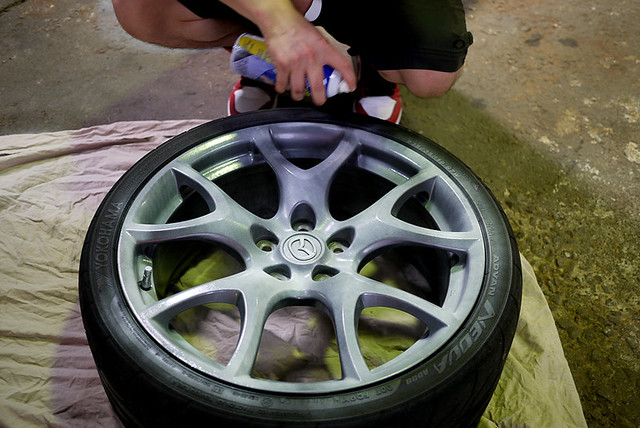
You do not have to mask if you wish, as the overspray will simply peel off. We recommend masking however to prevent making a mess! As you can see, we have slowly painted each double-spoke area section by section. This way, by the time we’ve gotten back to the first set of spokes, the dip would have dried enough for another coat. It’s that simple! Once you feel you’ve coated the outside enough, working on the inside last works well. Applying the same theory used to paint the spokes works here also – work in thirds or sections of the barrel and apply even coats.
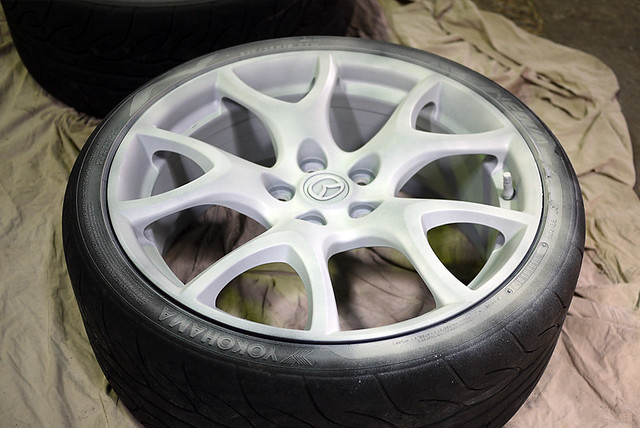
With the wheel completely coated in a base coat, it’s time to move onto the colour. A base coat is required for the bright fluorescent colours available, but for black and other simple shades, it is not a requirement.
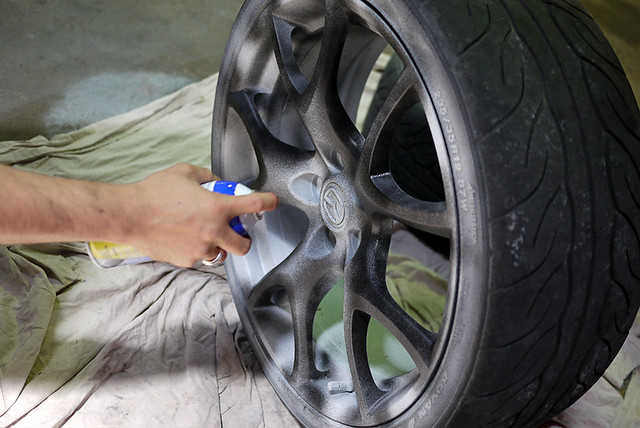
Working with the colour dips in the same method as before works fine – section by section, not piling on too much dip at once. Slow and steady is key with painting anything. Eventually, the dip will level / even out naturally and begin to create a nice surface.
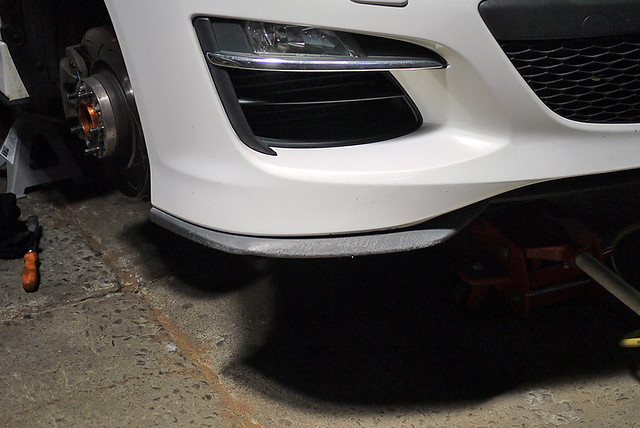
You can dip other items on your whilst your waiting for your wheels to dry. For example, the front splitter on our project RX8 is looking a little weathered under the Aussie sun.
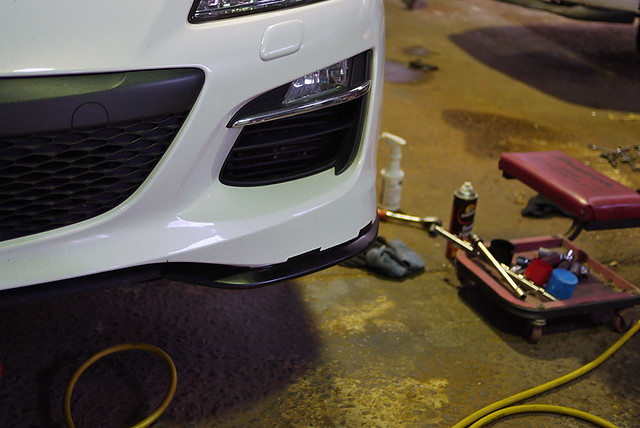
After a quick blast with the dip, it looks like brand new! Ignore our bad masking – you can get away with when using plastidip!

And the finished product? Tough as nails, literally. Not only will it put up with the abuse that daily driven wheels experience, it’ll look excellent doing so, and keep the original finish in good condition underneath. All in all, a win/win for project Rx8.
Head over to www.getdipped.com.au for information on their product and what services they offer!